The Mac Dropover App
With the native drag-and-drop tool on macOS, you can select one or more files then drag them anywhere else on the computer. What you can’t do with the tool is select files from different folders and move them simultaneously. It’s also impossible to move a group of files and move them to different locations in one drag-and-drag movement. Dropover takes a different approach to move files to different locations. With Dropover, a “shelf” gets added that hovers over everything else on your computer. To move files, drag them to this location first, regardless of their original location. Then, move them wherever you want, whenever you want. Dragging a file to a Dropover shelf doesn’t actually move it anywhere. Instead, what’s in Dropover is merely a shadow (my term) of the file. It’s only after you drag a file from Dropover to another location on your Mac that the file physically moves from the original location to elsewhere. The shadow file remains on the Dropover shelf, making it possible to move the real file repeatedly using the tool. What to move more than one file? Once you collect files from different locations, they’ll sit side-by-side on a Dropover shelf. From there, you can move individual or multiple files using the everyday copy/paste tool on your Mac.
Type of Files You Can Move
A Dropover shelf can hold any content, including documents, folders, spreadsheets, text snippets, web images, and more. If it’s a file, it will work with the app.
Dropover App Setup
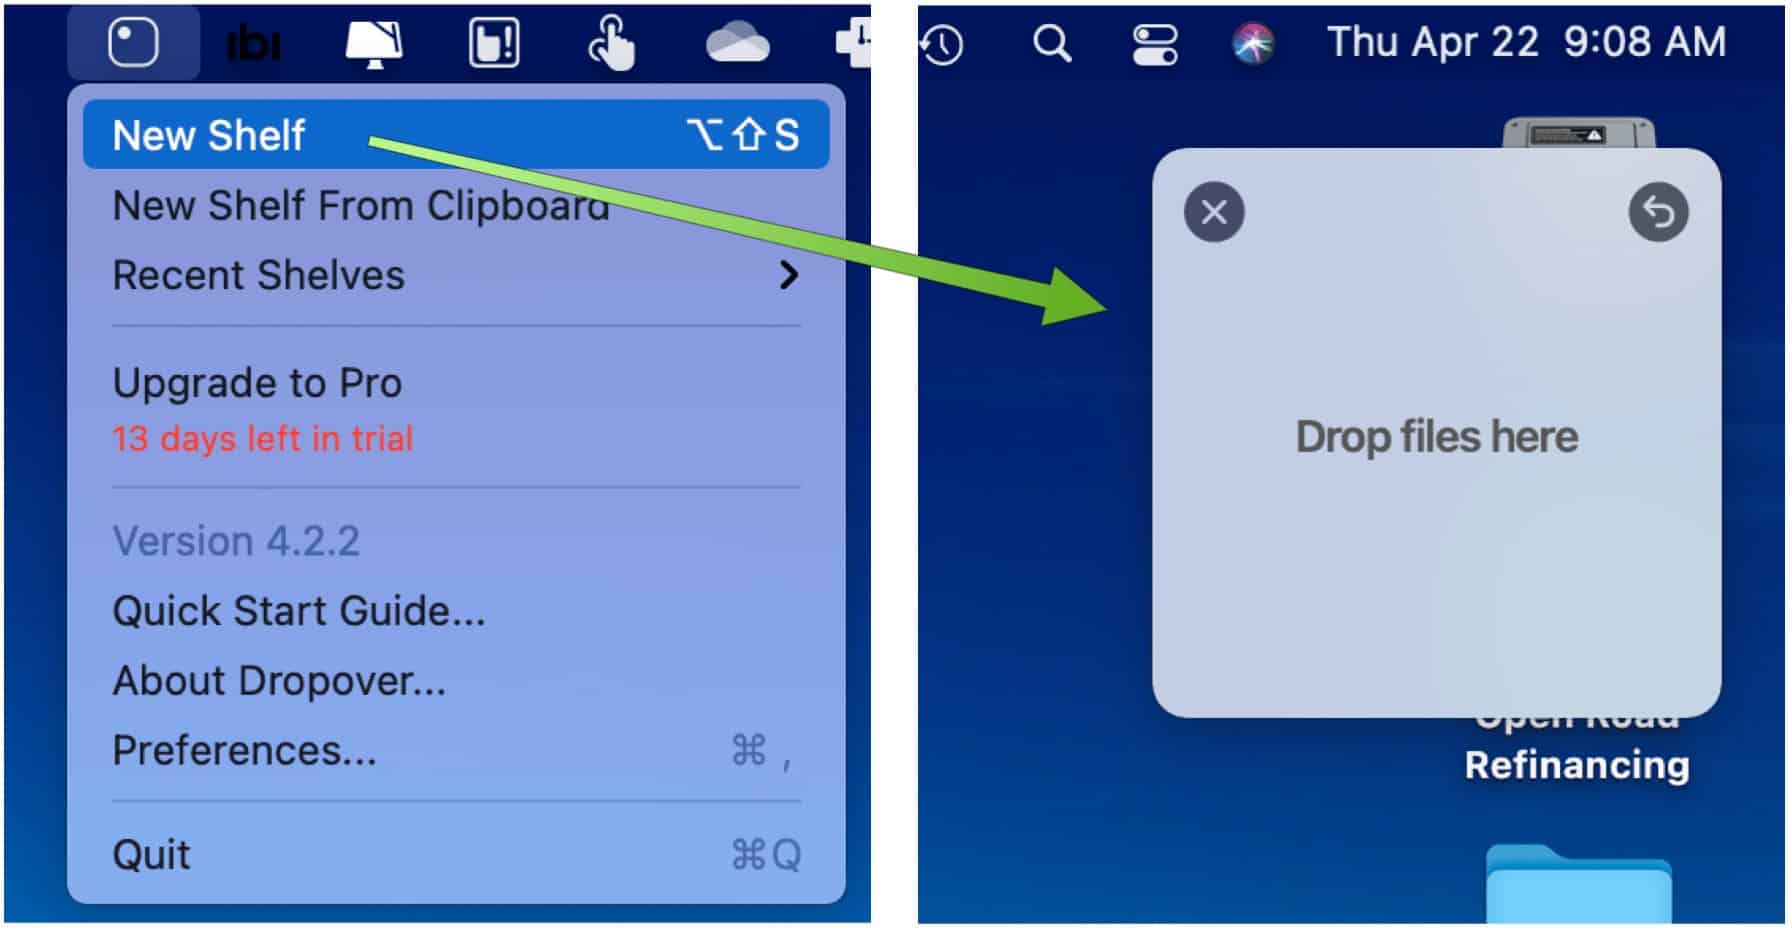
Once installed, Dropover resides in the Mac menu bar. To get started, click on it, then choose New Shelf. From there, you can begin adding files to the shelf. You can move the shelf to any location on your Mac desktop, and it will float there no matter where you are on the computer.
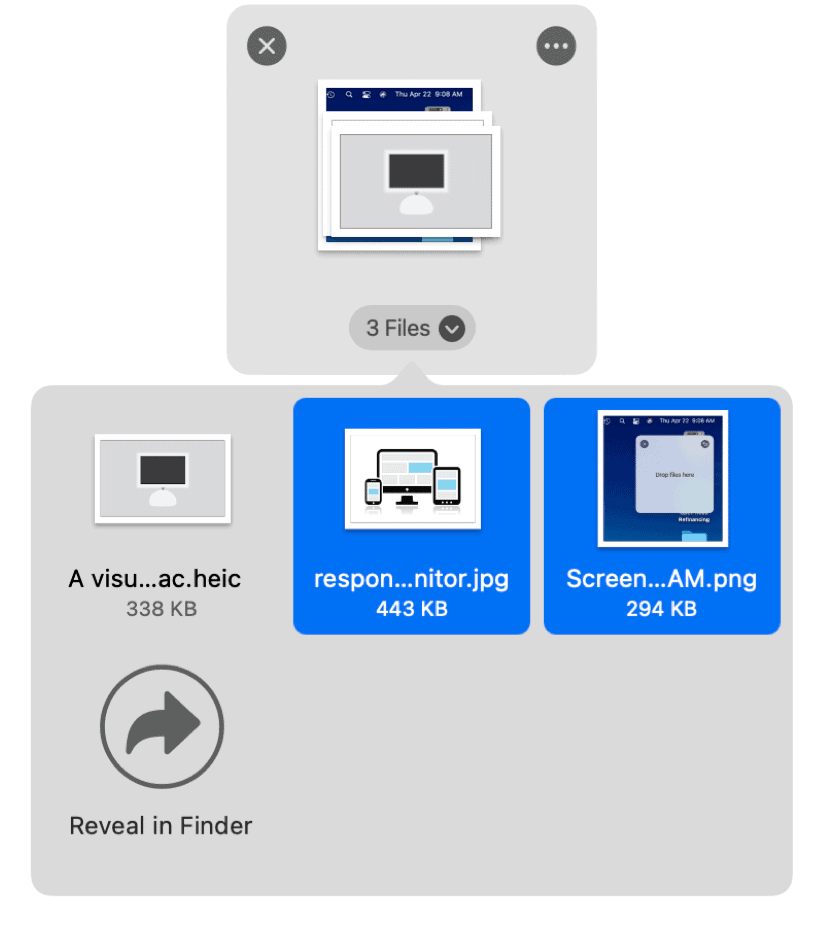
In the following example, image files are being dragged into Dropover from three separate locations. You can see each of the files by clicking on the Dropover shelf, so it expands. You can choose any combination of files to move them to another location, together or individually.
Once you’re finished, or you decide you no longer want to move the files, click on the “x” at the top left of the shelf to close it. To bring up previous shelves, choose Dropover from the menu bar, then select Rent Shelves > [Name of Shelf].
Dropover App: Additional Features
There’s a lot more the Dropover app can do than move files to new locations. Enhanced Dropover tools include the following.
Sharing
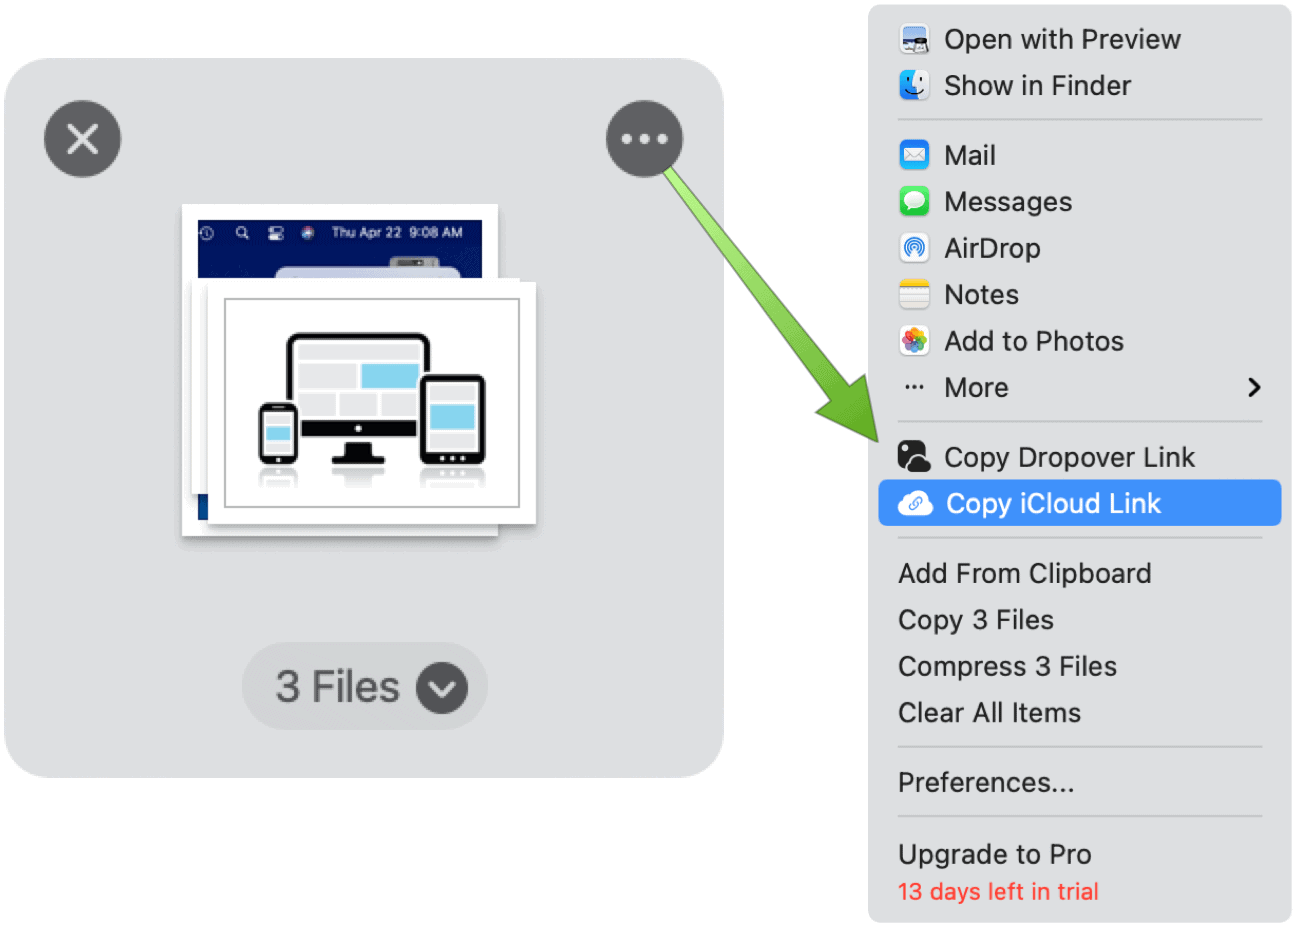
Cloud-based computing happens every day in home and business environments. This means it’s likely your favorite and most important files are located in various locations, both locally and in the cloud. With the Dropover app, you can save dragged content anywhere, including Dropbox, iCloud Drive, Google Drive, Microsoft OneDrive, and many more. There’s also a built-in cloud service. From there, you can create a public link, which you can use to share the collected content with others. You can also share Dropover shelves as you can with any other file or folder such as email, Messages, AirDrop, and more. The Dropover app also lets you add shelves to Clipboard, copy or compress files, and clear all items. Sharing options are located by clicking on the three-dot icon at the top right of a Dropover Shelf, as you can see below.
Multiple Shelves and Quick Actions
Dropover isn’t limited to only using or creating one shelf. You can create multiple shelves and also append files to an existing shelf to create a stack. No longer need a shelf? Close it and move on!
Additionally, you can perform other tasks on your shelves with quick actions, such as file previewing and opening.
Try Before You Buy
Dropover is a terrific little app that serves its purpose well. You can download it from the Mac App Store. It includes a 14-day free trial. For $5, you can continue using Dropover after two weeks and receive free updates for the life of the app. Comment Name * Email *
Δ Save my name and email and send me emails as new comments are made to this post.
![]()


