Setting Up User Accounts on Windows 11
Important Note: I am using Windows 11 Home edition, which requires you to have a Microsoft account to set up the computer. But after installing Windows 11, you can add a local user account.
Add a User Account to Windows 11
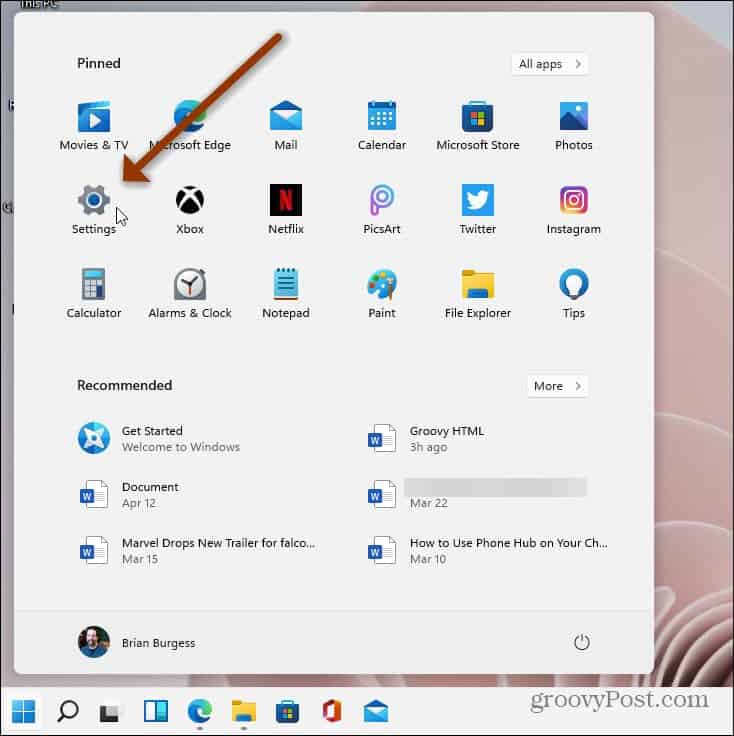
To get the process going, click on Start and then click on Settings from the menu. Alternately, you can use the keyboard shortcut Windows key + I to open Settings directly – without clicking through menus.
On the next Settings screen, click on Accounts from the list on the left.
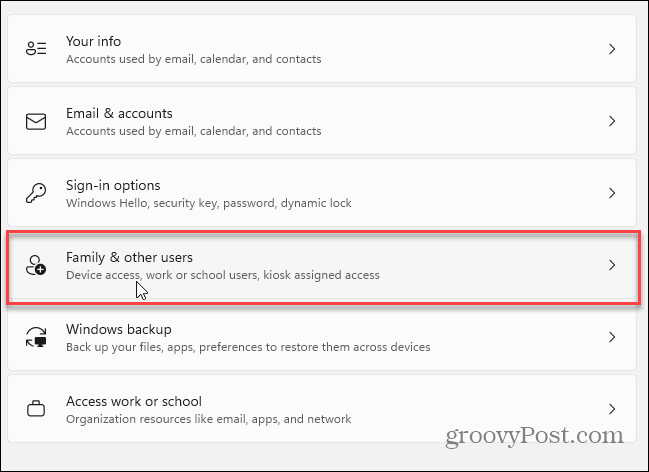
Now, from the menu of options on the right, click the Family & other users option.
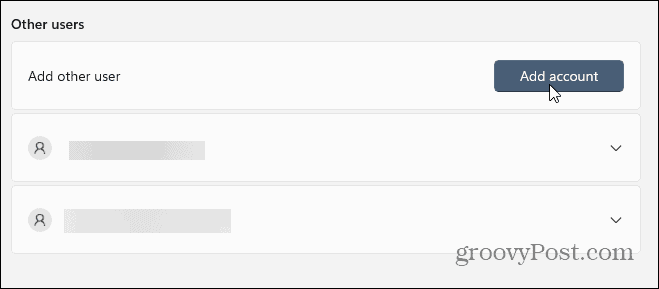
Now, under the “Other users” section, click on the Add account button.
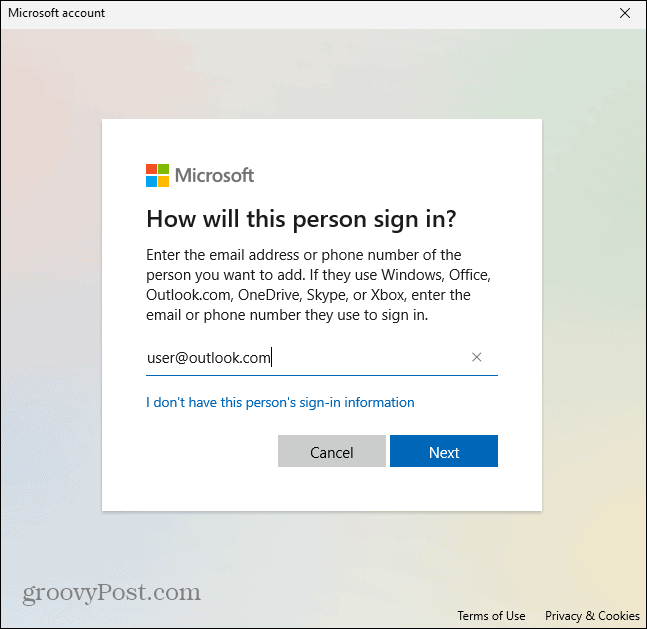
Next, you will need to enter the user’s Microsoft account data – how they will log in, username, email address, etc.
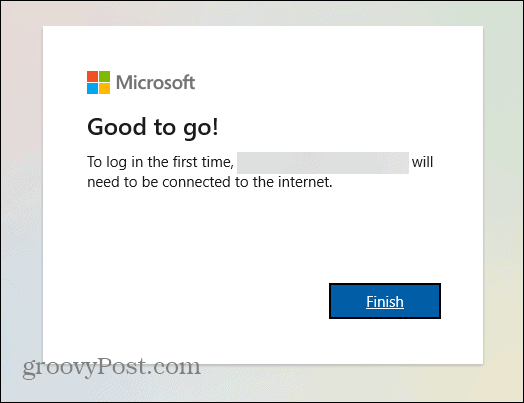
That’s it. You shouldn’t need to enter the user’s login credentials. They will have to do that when they sign in the next time. And do note the PC needs to be connected to the internet when they do.
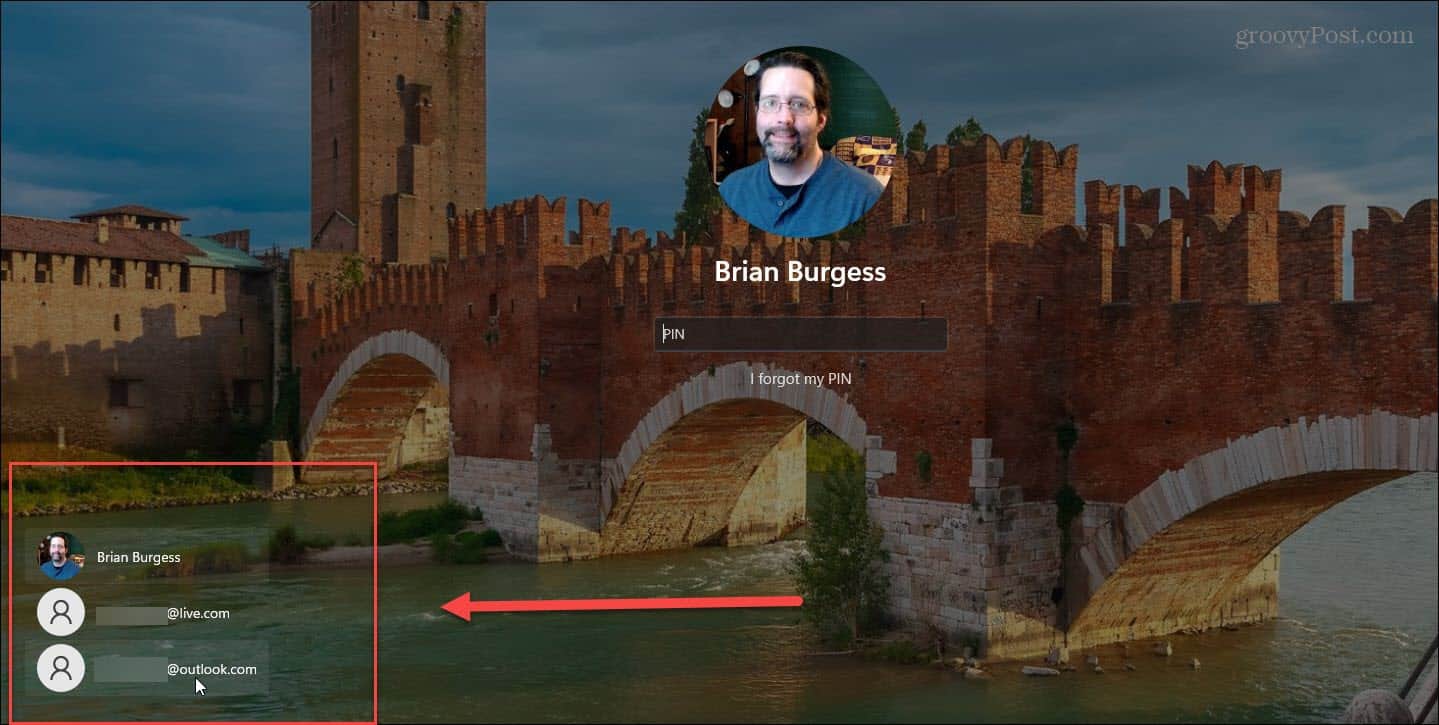
Now that you have added a new user (or users), sign out or restart the computer. When it comes back to the sign-in screen, you will see the other account(s) you added. They will be located in the lower-left corner of the screen.
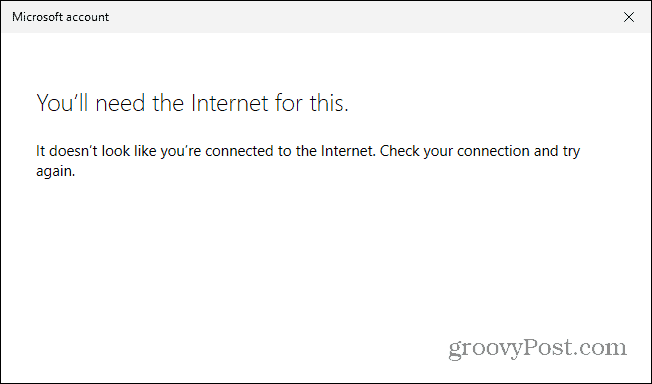
Have the user click on their account, and they can log in and get their desktop, settings, and other apps set up. Again, if your computer isn’t connected to the internet, the user can’t get their account going. Instead, you’ll see a message similar to the one below.
Microsoft says users running the Pro version of Windows 11 will be able to create local accounts from the start. However, if you set up an admin account with a Microsoft account, you can add a local user account afterward. And for more on the new OS, check out our article on how to rename your Windows 11 PC. Or take a look at how to change the default web browser to anything. Comment Name * Email *
Δ Save my name and email and send me emails as new comments are made to this post.
![]()
