Thankfully, presentation creators who use Google Slides have plenty of pre-built templates ready to use. If you can’t find the design you’re looking for, however, you may prefer to create a Google Slides template of your own. Here’s how.
Creating and Customizing Google Slides Templates
If you’ve ever created or customized a PowerPoint template, you’ll be familiar with the master slide. This is the template that your presentation uses to determine the default font, color scheme, background, and other formatting options used in your presentation. Like PowerPoint, Google Slides has a master slide feature and, like PowerPoint, this controls your presentation’s slide layouts, fonts, and more. This is also where you can add an existing Google Slides template (named themes).
Opening the Master Slide View
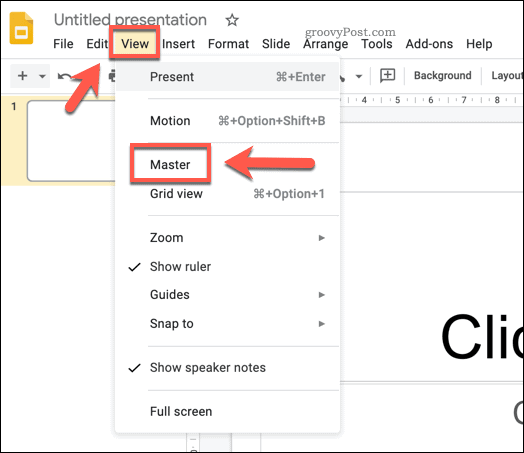
To create a new Google Slides template, you’ll need to switch to the master slide view. To do this, open a new Google Slides presentation and press View > Master in the menu bar.
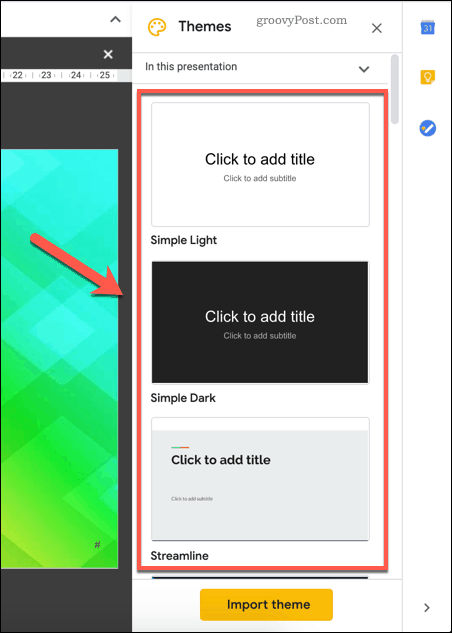
This will take you to the master slide view. This will show the slide layouts and color schemes used for the default Google Slides template (named Simple Light). You can select an existing template from the Themes menu on the right. One of these preset templates could be used as the basis for your new theme, so select one of the available options to apply to it.
Once applied, you can make changes to your template, then save it as your own.
Renaming a Google Slides Template
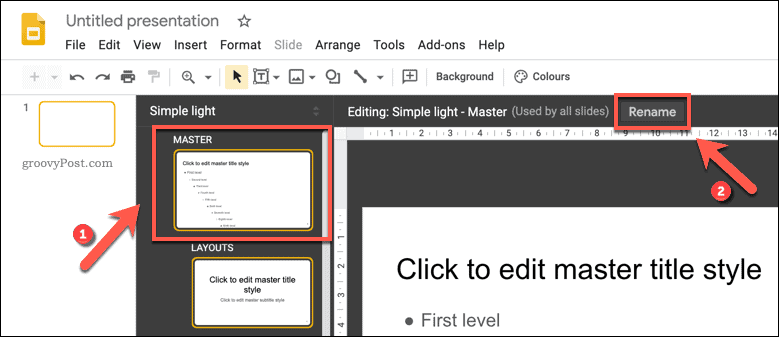
You’ll need to rename the template to make it your own. To do this, make sure that the master slide is selected in the left-hand panel. Once it is, press the Rename button above it in the slide editing menu.
In the Rename master box, provide a new name for your template. Press OK to save the updated template name.
Changing Text Styles in a Google Slides Template
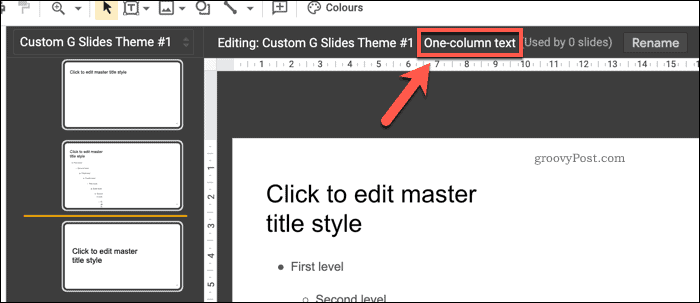
Once your theme has been renamed, you can begin to make changes to it. Different slide layouts are listed below the main master slide. You can use these for different types of slides. For instance, the first layout is the title slide, which you’d typically use at the start of your presentation. The next slide layout is the section header slide, which you’d use to break up different sections of your presentation. The purpose of each slide is shown next to the template name above the slide being edited.
You can customize the position, font, and color of any text boxes placed on these slides. You can also add additional text boxes to the slide layout or remove them entirely. To customize the text boxes, press them to select it, then use the customization options on the menu bar. You can change the font, size, emphasis, color, and more using these options.
If you want to apply changes to each layout (for instance, making all header titles the same color or emphasis), you’ll need to select and make changes to the master slide. Any changes made here will be applied to each slide layout below it.
Adding Background Color or Images to a Google Slides Template
If you want to change the background used on a template slide, right-click the template, then press the Change background option. As with changes to the text, doing this on the master slide will apply the same background to each slide layout.
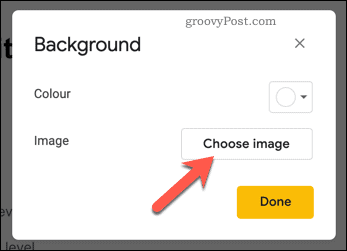
In the Background options box, you can set a background color, or insert an image. Click the Color option to select a preset color, create a custom color, or apply a color gradiant.
Clicking the Choose image button will allow you to apply a background image instead.
You can upload an image yourself, select an image from your Google Drive storage or from your Google Photos collection, by URL, or by taking a picture using your camera. You can also perform a Google image search to find a background image online for you to use.
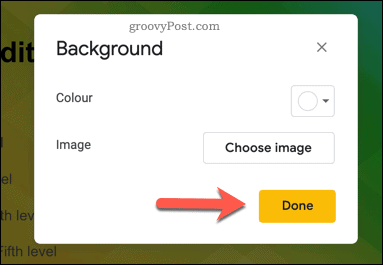
You’ll be able to preview any changes you’ve made to your background behind the Background box. You can make further changes, or press Done to save the background you’ve chosen.
Saving and Importing a Google Slides Template
If you want to save a new Google Slides template and use it again, you’ll need to give it a name. Provide a name for your template in the file name box in the top-left corner of the Google Slides window.
This will save the template to your Google Drive storage. If you want to import this template into another Google Slides presentation, you can do so by pressing View > Master in another presentation. In the Themes panel on the right, press the Import theme button. This will allow you to select the template you’ve created.
In the Import Theme menu, select your saved Google Slides template, then press the Select button.
This will change the existing template used in your Google Slides presentation to the custom template you’ve selected.
Google Slides: The Perfect PowerPoint Replacement
With a new Google Slides template ready to go, you can dazzle your audience with the right color palette and layout. Whether it’s for corporate or kids, a new template will strike the right note to help you present your data. Google Slides is the perfect replacement for Microsoft PowerPoint, but you can export your Slides presentation to the PowerPoint format, should you need to. Many of PowerPoint’s features, such as the ability to loop PowerPoint slides, can be found in Slides. Just as you can add video to PowerPoint, Google Slides has built-in YouTube support, letting you easily add video content to your presentation.
![]()

