Although the instructions below demonstrate the steps in Word, customizing the Quick Access Toolbar also work in Excel, PowerPoint, Outlook, and Access.
Add a Command to the Quick Access Toolbar
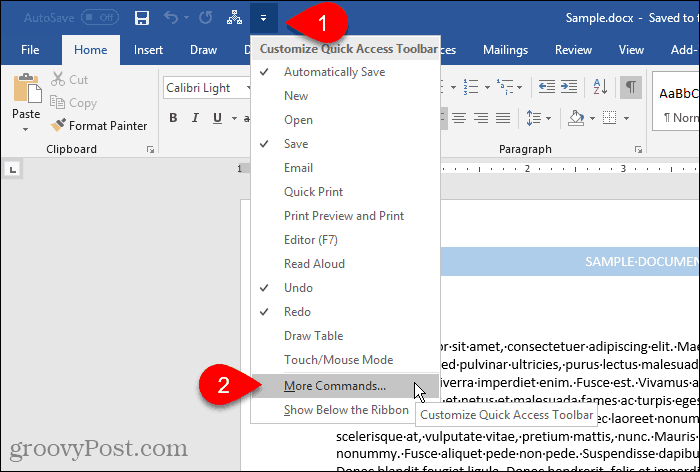
We’re going to add the Save As command to the Quick Access Toolbar. Normally, you must click the File tab and then click Save As. Adding the command to the Quick Access Toolbar gives us one-click access to it. Click the down arrow button on the right side of the Quick Access Toolbar and select More Commands.
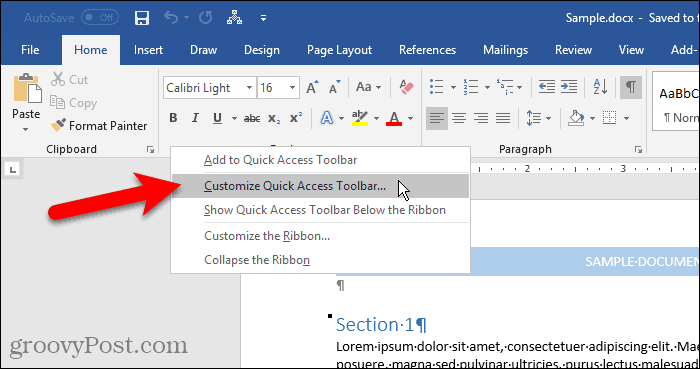
You can also right-click on the ribbon and select Customize Quick Access Toolbar.
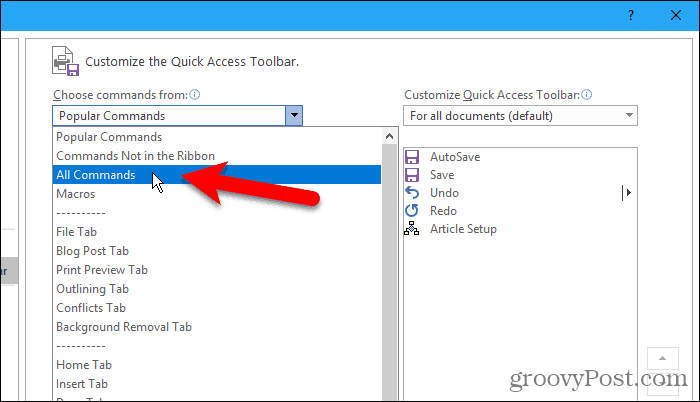
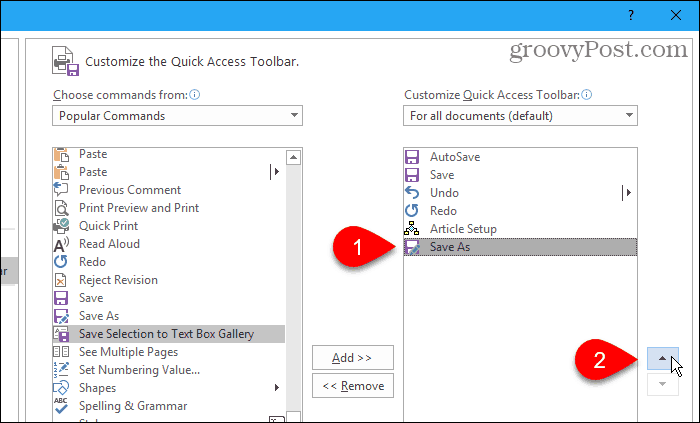
The Options dialog box opens to the Customize the Quick Access Toolbar screen. All the Popular Commands are listed by default on the left. If you want to add a command that’s not in the Popular Commands list, select another option from the Choose commands from drop-down list, like Commands Not in the Ribbon or All Commands.
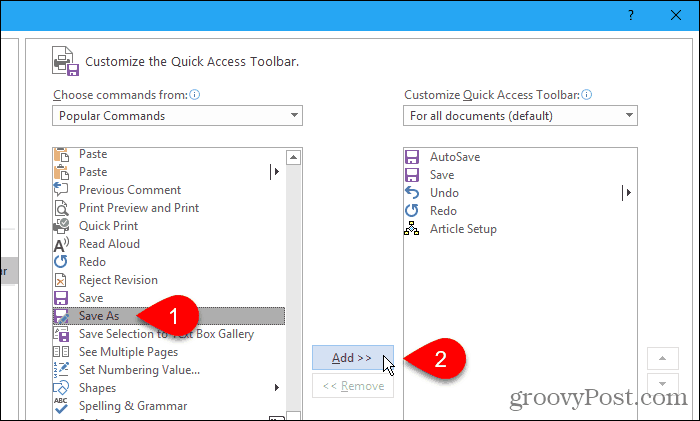
The list on the right side shows all the commands currently on the Quick Access Toolbar. To add a command to the toolbar, scroll down the list of commands on the left and select the one you want to add. Then, either double-click on the command or click Add to add it to the list on the right.
Rearrange and Remove Commands on the Quick Access Toolbar
You can change the order of the commands on the Quick Access Toolbar. To move a command, select it in the list on the right. Then, click the up or down arrow button to the right of the list to move it up or down the list. To remove a command from the Quick Access Toolbar, select the command and click Remove. Click OK once you’ve added the commands you want and arranged them in the order you want.
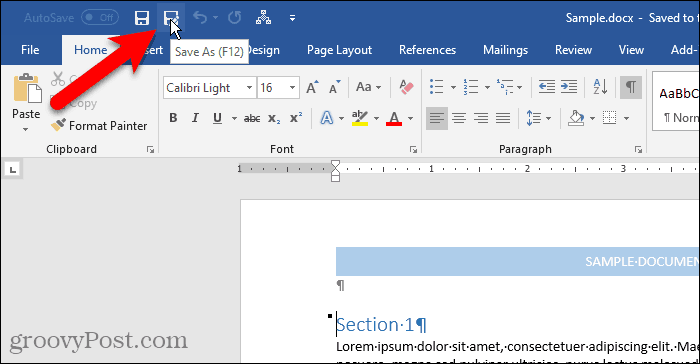
The command you added is now available on the Quick Access Toolbar.
Quickly Add a Command From the Ribbon to the Quick Access Toolbar
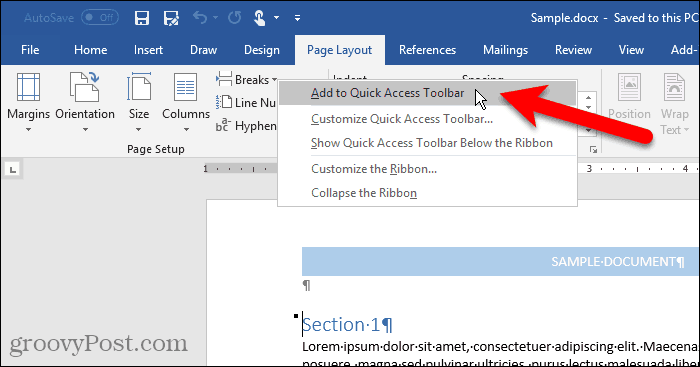
We’ve talked about customizing the ribbon, including creating a new, custom tab where you can add commands you use from various tabs in one place. You can use the Quick Access Toolbar the same way, adding commands from different tabs for quick, one-click access. For example, we’ll add the Breaks command (page breaks, section breaks, etc.) from the Page Layout tab to the Quick Access Toolbar. Right-click on the command button on the ribbon and select Add to Quick Access Toolbar. For commands that have drop-down menus, you might have to right-click twice to get the popup menu. The first right-click generally opens the menu.
Remove a Command From the Quick Access Toolbar
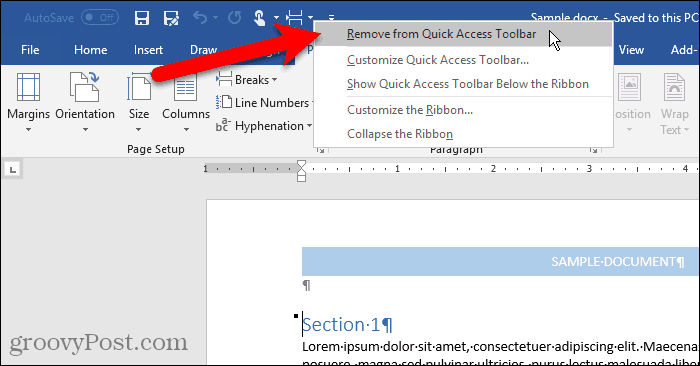
To remove a command from the Quick Access Toolbar, right-click on the command button and select Remove from Quick Access Toolbar. Again, for commands that have drop-down menus, you might have to right-click twice to get the popup menu.
Reset the Quick Access Toolbar
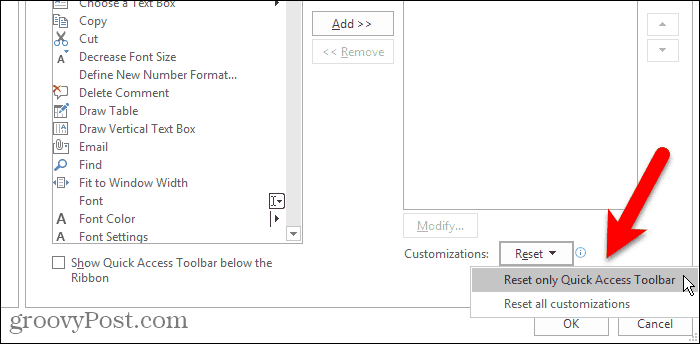
If you’ve customized the Quick Access Toolbar and want to return to the default setup, you can do that without manually removing each command. To open the Customize the Quick Access Toolbar screen on the Options dialog box, click the down arrow on the right side of the Quick Access Toolbar. Click the Reset button in the lower-right corner of the dialog box and select Reset only Quick Access Toolbar.
Click Yes on the confirmation dialog box to revert to the default Quick Access Toolbar setup.
One-Click Access to Commands and More
You can also add macros to the Quick Access Toolbar for one-click access to tasks you perform often. Do you use the Quick Access Toolbar? Which commands have you added to it? Do you prefer the Quick Access Toolbar above or below the ribbon? Share your thoughts and ideas with us in the comments below!
![]()

