When you know how to use track changes in Google Docs, you never have to worry about losing changes to your documents. All revisions are automatically saved and logged by default. If you ever find that you need to review or recover those changes, doing so is just a matter of a few clicks. In this article, we’ll cover how track changes in Google Docs works and how to use it effectively.
Use Suggest to Review Changes
One of the safest ways to edit or revise a document in Google Docs is by changing Editing mode to Suggesting mode. You do this by selecting the dropdown arrow at the upper right. The arrow will be next to the word Editing or Viewing, depending on which mode you’re in.
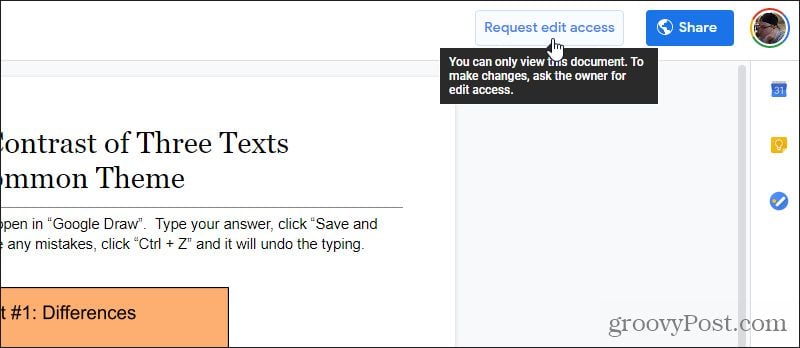
If you don’t see the Suggesting (or Editing) option, then you only have View permissions on the document. This will happen if you aren’t the document owner. In this case, you need to request Edit access. To do this, you should see a Request edit access button next to the blue Share button at the upper right corner of the window.
Once the owner of the document provides you with Edit access, you will be able to see the Editing dropdown. Once you’ve switched to Suggesting mode, start editing the document and you will see the changes appear with the old text you’ve edited replaced as strikethrough text.
Editors will recognize this “markup” editing approach. It’s especially suited for publication editing, or for teachers who would like to correct essay papers in a way where students can see all of the corrections that were made.
Special Notes on Suggesting Edits
Some things to keep in mind when editing in Suggesting mode. If you split a paragraph into two, you’ll see space appear along with two parallel green lines.
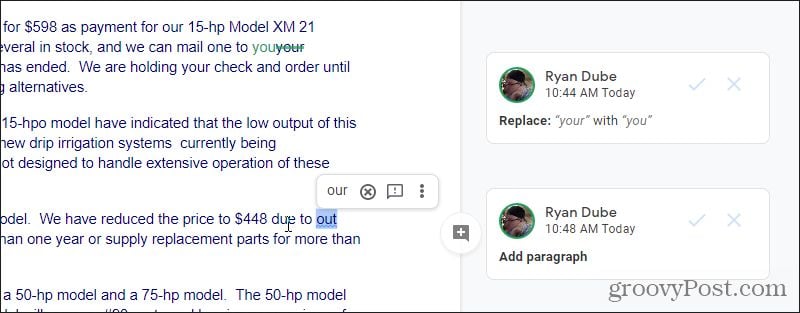
The upper line is the bottom of the old paragraph. The lower line is the top of the new paragraph. The space between those lines is the space you’ve added during editing. Another helpful feature in editing mode is that Google Docs will display blue squiggly lines under words that it identifies as misspelled. If you highlight or click on the word, it’ll suggest a correction in a pop-up just above it.
You have the following options when these appear. You can select:
The correct word to make the editX circle icon to ignore the suggestion! comment icon to provide the author with automatic feedback suggestionsSelect the three dots to do an additional spelling and grammar check
In most cases, you’ll just want to select the correct word and move on. One more useful Suggestion mode editing feature is feedback comments. Highlight words or paragraphs you want to provide feedback on, and a small comment icon will appear to the right of that selection.
When you select this, a new comment window will appear in the right margin where you can write comments or suggestions to the original author. The author can reply to any of your suggested edits or your comments with their own comments. This makes for a useful dialogue during any document revision process.
View Previous Google Docs Versions
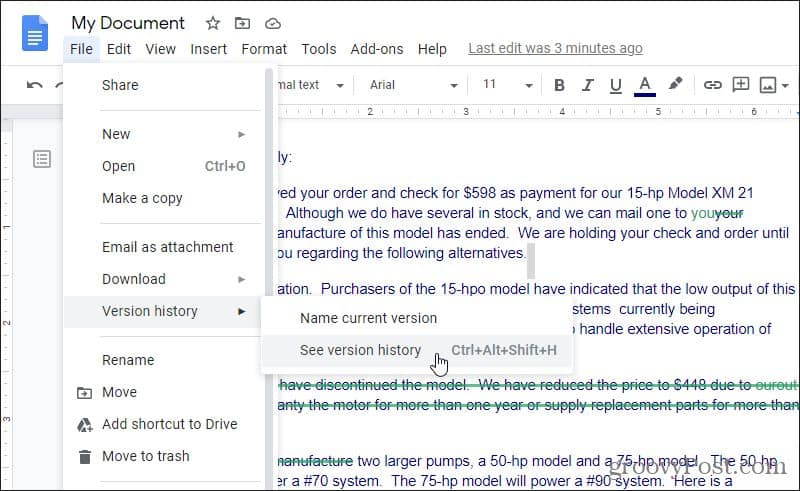
As you’re making edits to a document, Google Docs regularly auto-saves your work so you won’t lose anything. Because of this, you can easily see all of those saved revisions. To do so, just select File from the menu, select Version history and select See version history.
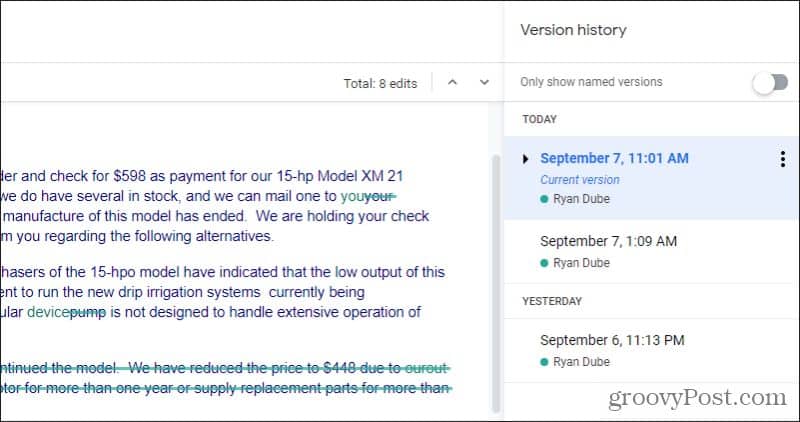
This will show you all of the major revisions that have been made to the document (by anyone). Revisions are organized by time and grouped by day.
You can view individual revisions made during one editing session by selecting the dropdown arrow to the left of that revision date/time. Indented underneath you’ll see a list of all of the auto-saved revisions during that editing session.
Any time you select any one of these past revisions, you’ll see that version of the document in the large document pane to the left. Seeing versions is useful, but what if you want to highlight or save specific revisions? You can do that too.
Saving Previous Google Docs Version
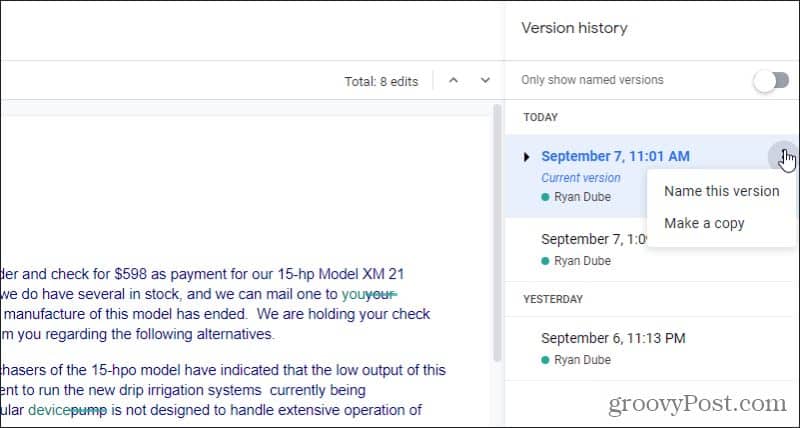
If you know you’ve just completed a major revision of a document, you can mark that revision by naming it. To do this, repeat the process above to view all versions. Find the latest revision you want to name and select the three dots to the right of that date and time. You’ll see a menu appear where you can select Name this version.
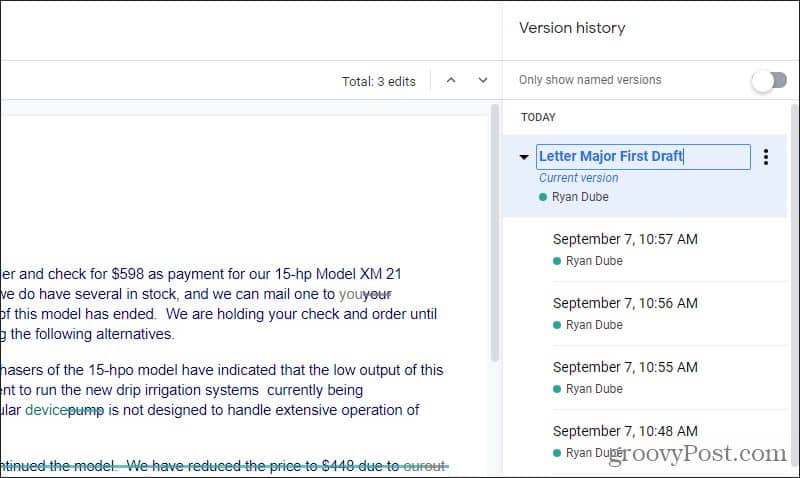
The date and time will turn into a text field where you can type the name for that revision.
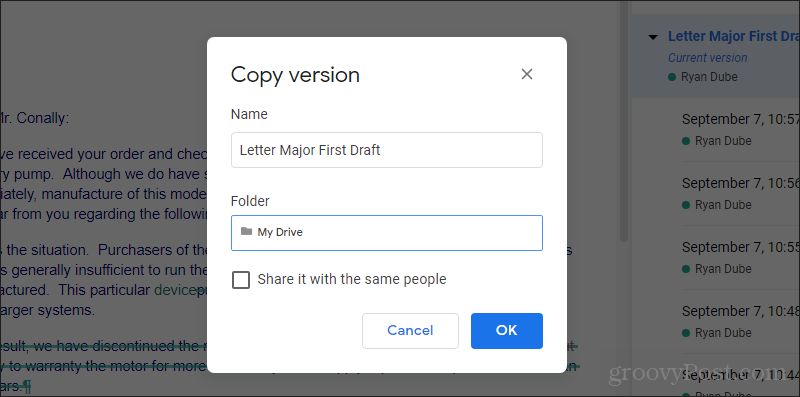
When you’re done typing, just press Enter and the new name will stay. The next time you’re searching for that specific revision, just select the Only show named versions toggle at the top of the list to enable it. That will only show all revisions you’ve named in the revision list. What if you actually want to create a whole new document from an older revision? You can do that too. In the dropdown menu above (when you select the three dots), select Make a copy instead. This will open a new window where you can name the revision, select the folder in Google Drive where you want to save it, and select OK.
You can also enable the checkbox to share that new document with the same people, and the same permissions, as the original document. Once you’re done, you’ll have a new document based on the version you just saved.
How to Recover Old Docs Versions
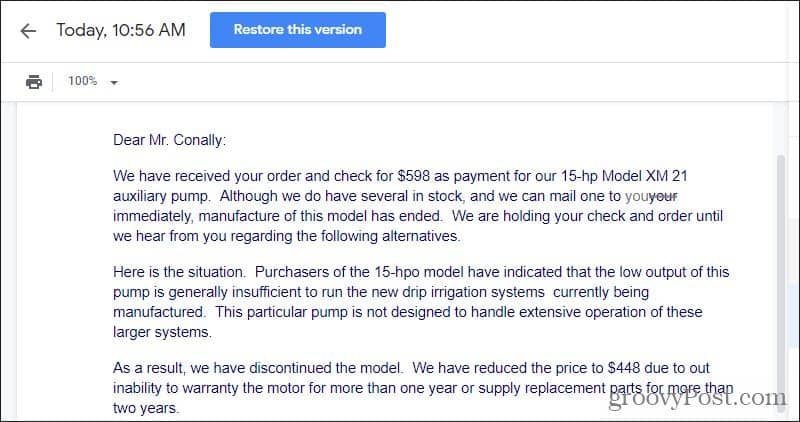
As you’re viewing older versions of the document, you can recover that version at any time by selecting Restore this version at the top of the window.
This will revert the current version of the document you’re working on back to that older version. Don’t worry if you mess up! The version you just replaced is also saved as a past revision, so if you want to switch back, just find that revision and restore it back to that one instead. Dealing with track changes in Google Docs doesn’t have to be complicated. In fact, it makes recovering from major mistakes far easier than most other word processing applications out there. If you’d like to learn more about using Google Docs, make sure to read our getting started with Google Docs guide.
![]()


