Note: You won’t be able to access Indexing Options unless Windows Search is enabled. To get started open up the Run menu and type in the following:
Alternatively, just open up the search box then type: index and click the Indexing Options setting link.
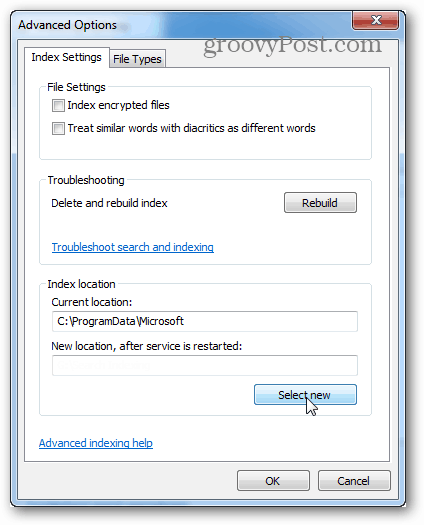
In Indexing Options click the Advanced button.
Now under Advanced Options click the Select New button.
Navigate to the drive and folder where you want to store the new index database, then click OK.
In the previous window click OK to save changes and exit.
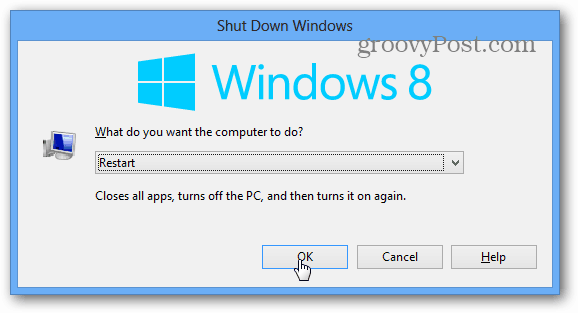
Now just restart the computer, and the Windows Search index will be repopulated in the folder of the drive you selected. That’s all there is to it!
Comment Name * Email *
Δ Save my name and email and send me emails as new comments are made to this post.


![]()
