Quick Image Resizing in Outlook 2013
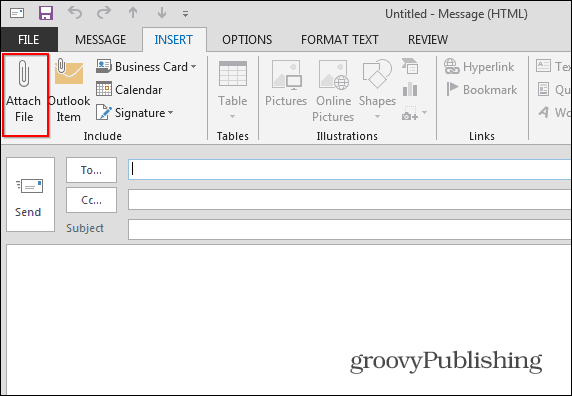
While this is a quick method of resizing images, you should know that it will only allow you to resize them to a resolution of 1024 x 768 pixels. This won’t give you the ultimate full quality of say a RAW image, it can still be which useful in a lot of situations. Start by opening Outlook and composing a new message. Then click the Insert tab on the Ribbon, and then click the Attach File.
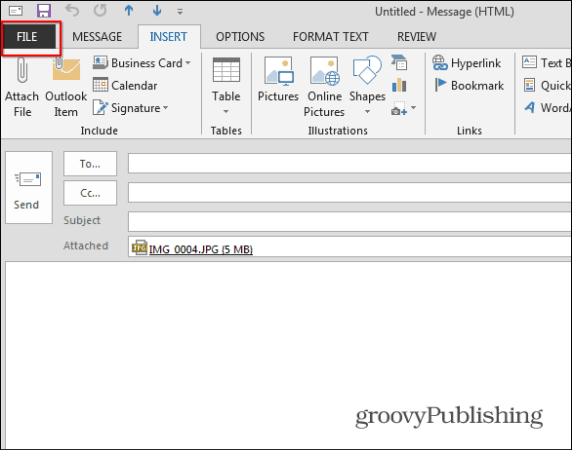
Find the image you want to resize and attach to the message.
The next steps are the key for making this work. Once the image has been added as an attachment, click the File tab.
You’ll see the following screen in the Info section. Select “Resize large images when I send this message” and click the arrow on the top right side to return to the Compose screen. Type your message and send it off.
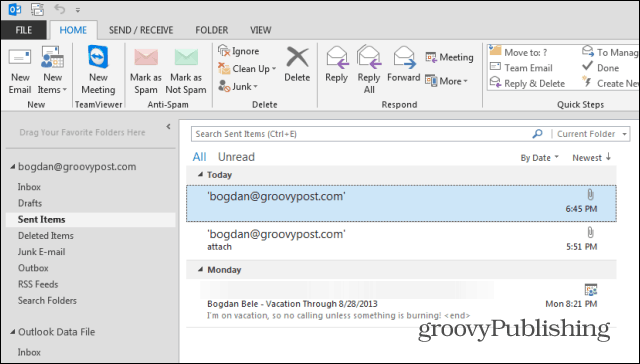
If you’re using this trick to resize the image for yourself, type your own email address and send it to yourself. After that, you can open the message from the Inbox or from Sent Items.
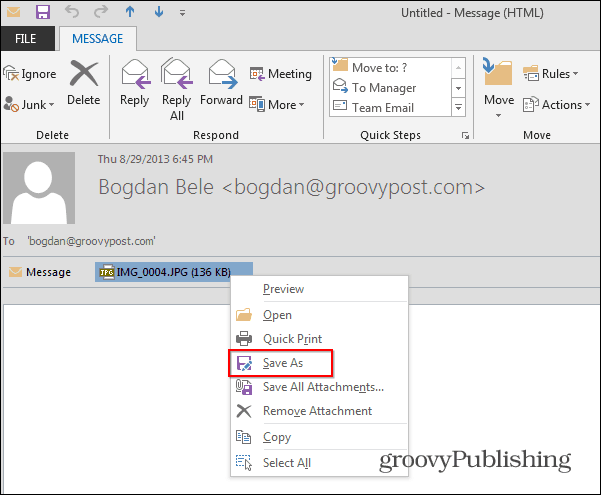
Once you open the message, you will notice that the image attachment is significantly smaller in size. In this example, I used a 5 MB image file and it’s been compressed down to only 136 KB. The only thing left to do is to right-click the name of the file and Save it wherever you want on your computer.
If you’re sending the image to a business colleague they’ll be able to recieve it and check it out. Then if you need to send the original large RAW photo, you can use Dropbox, SkyDrive, or service like YouSendIt. There is a related FAR greater problem which is where the sender needs to illustrate a point midway through an email and therefore he/she inserts the images into the HTML email body. All works fine if the Windows “DPI” is set to 100% (96DPI) however for those of us with higher resolution screens, because Windows text is too small for us to easily read, we are effectively forced to increase Windows’s DPI setting to something larger. In my case 100% ==> 125% (120DPI). But users on Full HD resolution laptops often set it to 200%. This means any inserted image has both it’s height and width DOUBLED. And the extra pixels are created by physically blurring the image. Through unthinkable stupidity by Microsoft, Outlook has for many many years physically re-sized any images inserted into the body of the email if the Windows DPI is not 96 (and the image’s DPI setting is not DPI too). In my case it physically enlarges and BLURS all images by 25% the moment you press “Send” in Outlook. Yes, even Outlook 2013 still does this. And as far as I can tell there is no way of switching this ‘feature’ off. Utter nightmare. Any suggestions? Can it be that my Yahoo browser is limiting the size? It never did previously. Also, in your original comment, you actually use the words “IMAGE ATTACHMENTS”, which in our world does not include PDF files. Just because your PDF is a picture does not make it an image file. There you go, some free info, now go and learn how to use google. Comment Name * Email *
Δ Save my name and email and send me emails as new comments are made to this post.


