Setting Up the Contacts App
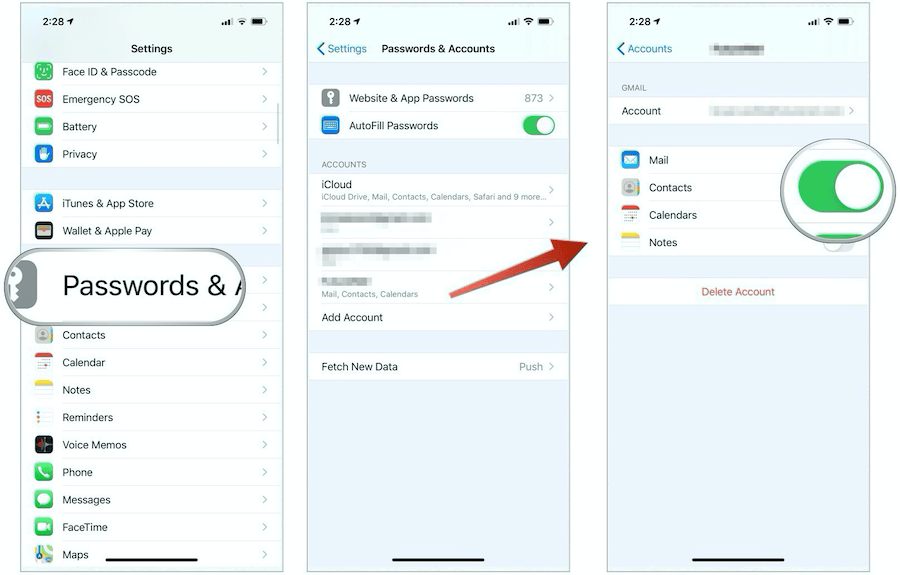
The information contained in the Contacts app comes directly from your email account. For most iPhone users, this is iCloud, although it could also be Gmail, Microsoft Exchange, or many others. To add your email account to iPhone:
Turn on Contacts
You must now confirm the activation of contacts for your email account on the iPhone.
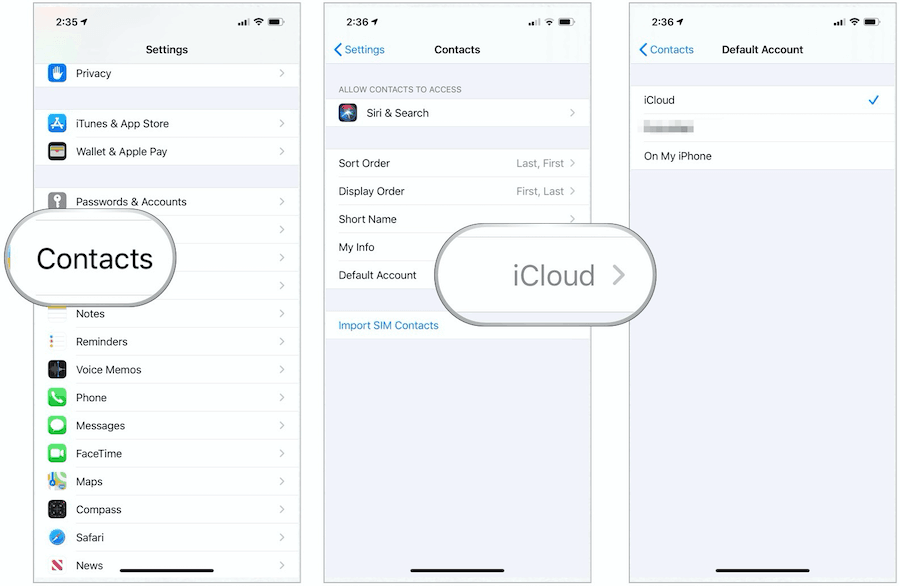
Set Up Default Account
It would help if you kept your contacts centrally located, regardless of how many email accounts you have. Ideally, your iCloud account should be the default account. To set your default contact account:
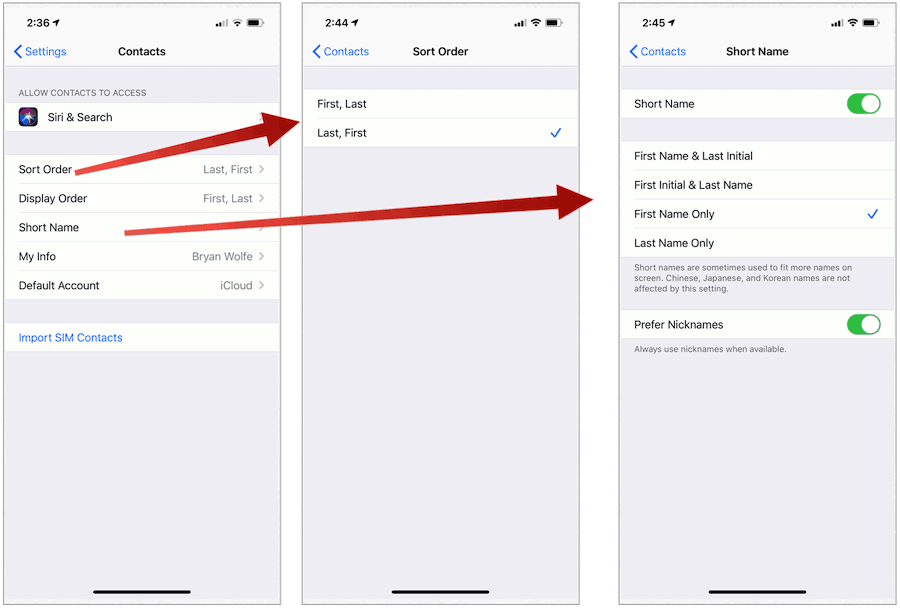
Customizing Your Contacts
Before you add contacts to the official app, you should decide on the sort order, display order, and short name.
The sort order can be First, Last or Last, FirstDisplay order can be First, Last or Last, FirstThe short name can be the First Name and Last Initial, First Name and Last Name, First Name Only, or Last Name Only. You can also set whether to use nicknames when applicable.
You can find each of these options by:
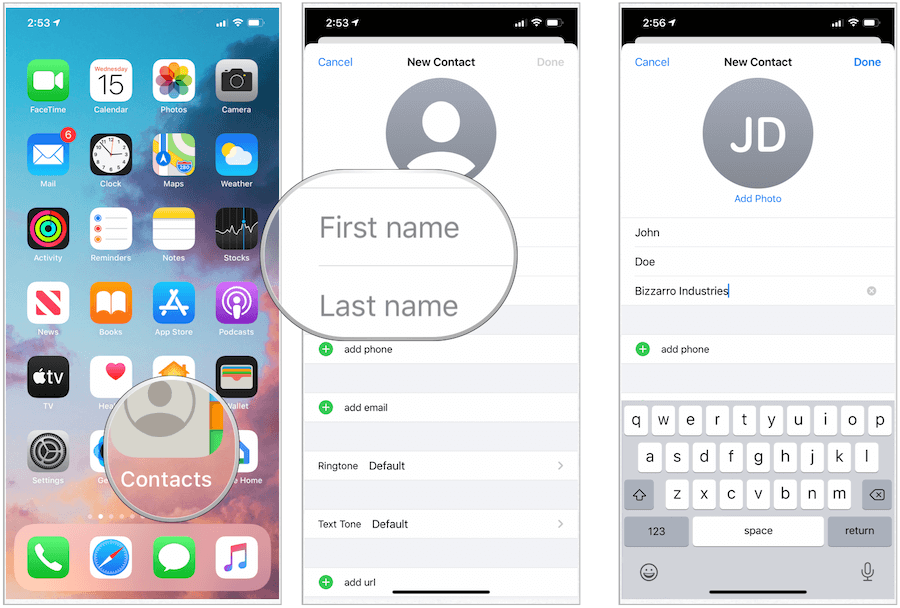
Adding New Contacts
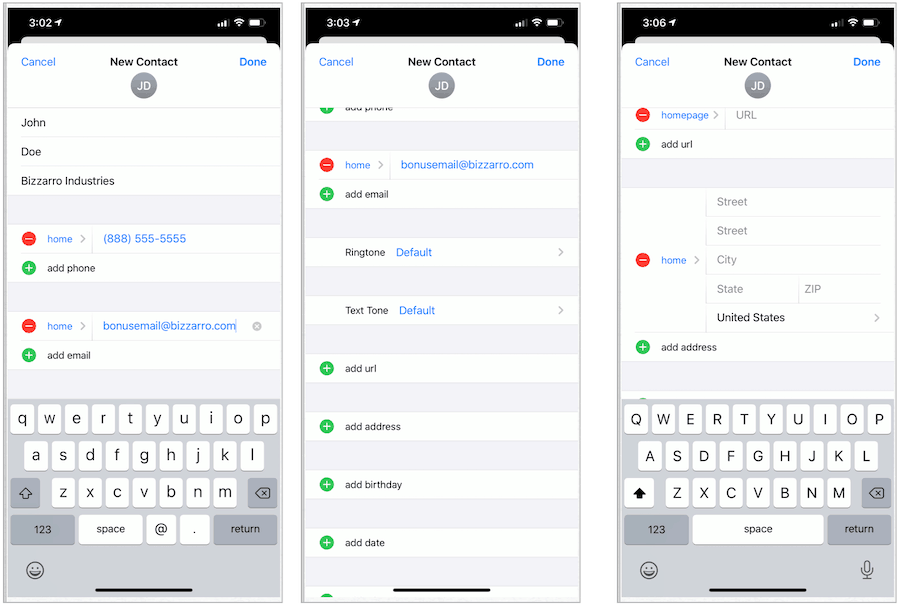
To add a new person to your Contacts app:
You can also add additional information, including:
Select Add Phone, select the type of phone and add a phone number for the contact. Repeat for other phone numbers for that person.Choose Add Email, select the type of email, and add the email for the contact. Repeat for other emails.Tap Ringtone and Text Tone to customize the sounds for this contact or leave the default selections.Select Add URL, select the type of URL, type the URL. Repeat as needed.Choose Add Address, select the address type, then type the Street, City, State, Zip, and Country for the contact. Repeat for more addressed.Tap Add Birthday, then add the birthday for the contact.Select Add Date, then select the type of date to add. For example, you could include the contact’s anniversary.Choose Add Related Name, then add the type of relationship for the person, then select the person. Use this field if someone else in your contacts is related to this person — for example, a contact’s mother.Select Add Social Profile to add the contact’s Twitter, Facebook, or another social account.Choose Add Instant Message to add the person’s Skype or another instant message account.Use the Notes section to include additional information for the contact.Choose Done to add the person to your Contacts app.
Here’s an example:
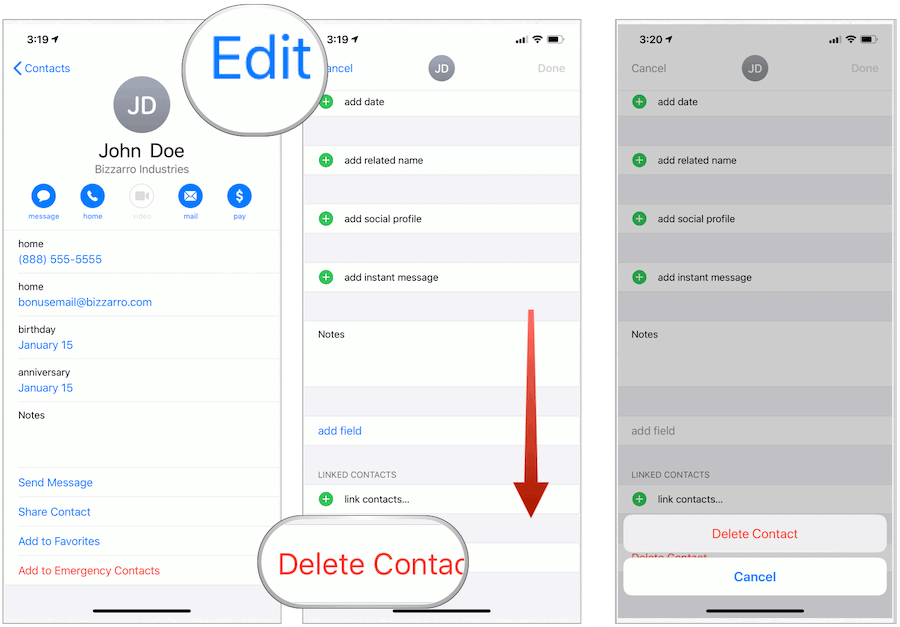
To Delete a Contact
To remove someone from your Contacts app:
To Make a Contact a Favorite
For the contacts, you expect to call or text often, it’s best to make them a Favorite. That way, their contact information is quickly available in the Phone app on the iPhone. To make a person a favorite: You can find your favorites in the Phone app under the Favorites tab.
Removing a Favorite Contact
You can remove a contact as a favorite by:
Block Contacts
You can block someone’s phone number regardless of whether they’re listed in your Contact app. If they are listed:
You can also block the number for those who have called you but are not listed as a contact.
Remove Duplicate Contacts
Depending on your work type, your contacts list can grow significantly over the years. To remove duplicate persons in the native Contacts app on iPhone:
A Better Way
Finding duplicate contacts gets much more difficult the larger the number of Contacts on your iPhone. However, before things get too difficult, you should consider a third-party solution. Among the apps designed to better assist you in remove duplicate contacts on iPhone are:
Cloze Relationship ManagerMy Contacts Backup ProContacts+
Sharing Contact Information
Apple has made it much easier to share personal information from the Contacts app. For example, to share individual contact information on iPhone:
Making Contact
The Contacts app doesn’t just store your contact information. You can also use the app as a starting point to communicate with someone. At the top of each contact card, you’ll find a button for each type of communication activity for that person. Of course, whether a button is active depends on the information included on the contact card. Remember those emails or phone numbers you placed for a contact? You can tap on those to begin communicating, whether through Phone, Messages, or FaceTime app. The native Contacts app for iPhone and iPad is simple to use and maintain. Best of all, if you’re using iCloud, your contact information automatically syncs across other devices logged into your account.


![]()
